Friday, December 26, 2014

Hey, this is cute!


 This was an insight that should have occurred weeks ago, but only came recently: a provisional cast-on (PCO) would be an excellent way to achieve a really stretchy beginning for the crimped stitches! When the item is done, the PCO can be removed and the resulting loops bound off at the same tension as the stitches at the end. They have to be bound off, or your project might start unraveling from the beginning up.

But would it really? It turns out that k1, p1 ribbing cannot be unraveled from the beginning, so by substituting that for the first row of your pattern, you can just take out the waste yarn and that's that!

It gets better, though. This method forms cute little picots along the beginning edge.

There are a number of ways to do a PCO. I prefer the crochet chain method as it is very stable. Choose a waste yarn that is smooth and a good contrast with your project yarn.  A word of warning, though: if your project yarn is light in color, don't pick too dark a waste yarn. Even a smooth yarn can leave a bit of lint and red lint on a white project . . . not so nice.

Start by crocheting a chain in waste yarn with a hook that will produce stitches large enough to get your needle through. You'll need one chain for each cast-on stitch plus a few extra since the occasional chain may not be obvious when you go to pick up in it. Cut the waste yarn and pull the tail through the last chain to secure it.

Look for the back of the chain. (It's the side that doesn't look like a chain.) The bumps you see are the backs of the stitches. They will be oriented differently depending on whether you're holding the final chain to the right or the left.


Pick up the needed number of sts in the backs of the chains as per the diagram. Work Row 1 (RS) in k1, p1 ribbing. It doesn't matter which st you start and end with.

Continue with  Row 2 and the rest of the pattern stitch. Obviously, on subsequent repeats Row 1 will be as normal.

When you do the crimping row, make sure you go into the stitches as shown; don't go into the waste yarn chains. The heads of the stitches that appear as purls will be much closer to the waste yarn and it is easy to miss the stitches themselves.

Remove the waste yarn. If you've picked up the stitches correctly, you can just undo the last chain and quickly take it out. If not, you will have to work stitch by stitch. (It's usually a combination of the two.) In either case, be a little bit gentle so that the picots are not distorted.

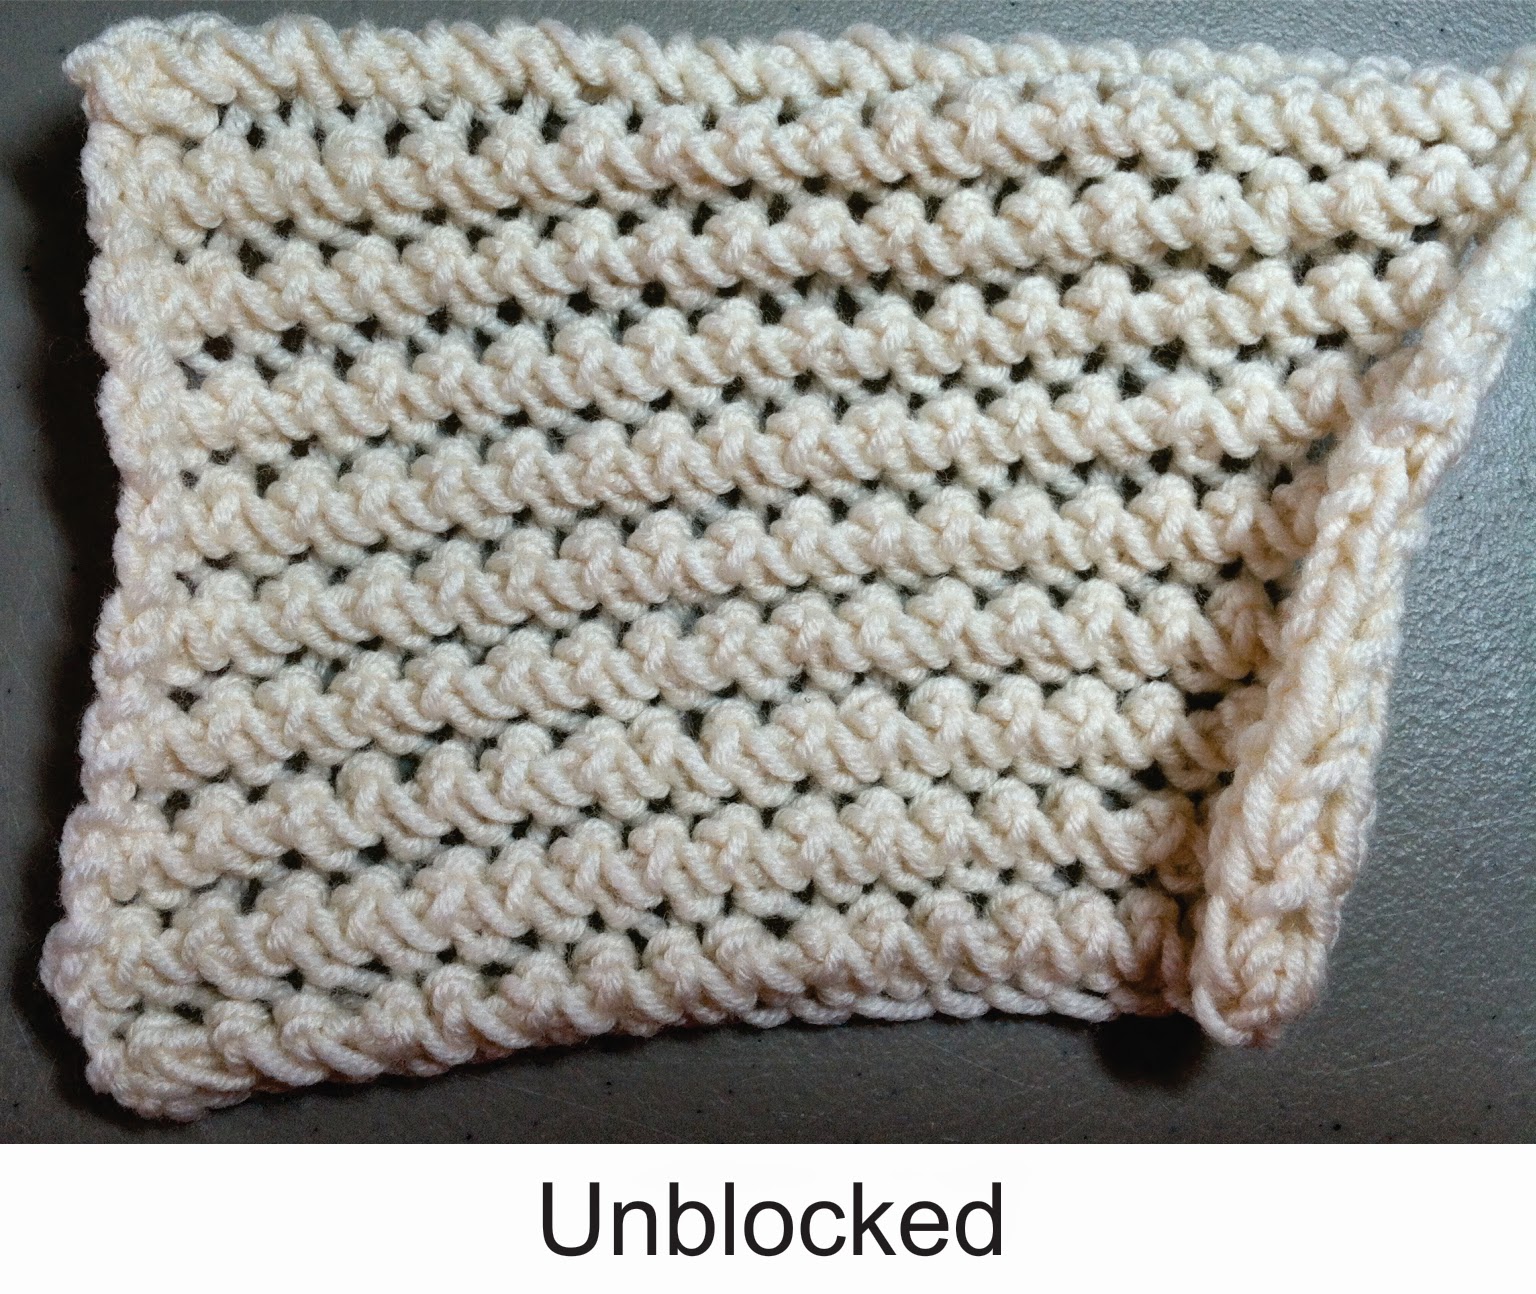
Finally, block the piece. Wet and stretch it well. Pin the picots individually. Allow it to dry.

I did try this method on an extremely small seed stitch swatch without the crimping. It does form picots but not as prominent or nicely shaped. It's an idea worth pursuing on seed stitch, moss stitch, or, of course, k1, p1 ribbing, but I'm not going to go down that path right now. If anyone does try it, though, please let us know how it works out.

Until next time . . .


Saturday, December 6, 2014

Embroidering Beads On


The stitches used in this sample are so basic that I am almost embarrassed to call them "embroidery". (For real embroidery, you might want to check out this site. In a few minutes, I saw how to do some new-to-me stitches and learned about some unusual embroidery styles. More things I'm gonna wanna try! )

Do remember, though, that embroidery on knitting does not require a hoop; that would only crush the fabric.


The first step in this particular sample is to make a simple running stitch. Thread a yarn needle, secure the yarn to the back of the work, then take the needle to the front through the first space, to the back through the next, and so on. End by securing the yarn to the back. This step is shown in the salmon-colored lines in the following diagram.


The second step is called "lacing". Again, start by securing the yarn to the wrong side. Following the blue line, go up under the first running stitch and down under the second. At Point A, unthread the yarn needle, string a bead, and rethread the needle. Continue across. Be aware of how tightly you're pulling the yarn. The beads don't have to be super-snug against the fabric, but you certainly don't want the embroidery yarn to be pulled tight.


The second pass is shown by the green line for clarity only. You are still using the same strand of yarn. Take the needle back under the previous running stitch in the opposite direction from the first pass. At Point B, unthread the yarn needle, string a bead, and rethread the needle. Finish the row and secure the yarn on the wrong side.


Essentially, the passes are two opposing waves. The first pass forms troughs between every other pair of running stitches; the beads sit in these troughs. The troughs of the second pass fill the spaces in between those of the first; again the beads sit in the troughs.

Well, that's it for now. Please use the "Comments" if you have any questions.

Until next time . . .


Wednesday, November 26, 2014

Maybe I CAN braid it!

The braiding did not start off well. I wanted to do a four-strand braid (which I had never done before) so I could use two strands of each color. I found an easy-to-follow instruction page here, pinned my swatch to a blocking board, and proceeded to go at it. The braid kept wanting to twist, making it difficult to tell which strand was which. Those times when I was able to make some progress, I found it impossible to keep my tension even.


It occurred to me that it would be so much easier if the strands were weighted. This triggered what little I know about bobbin lace and I figured I might have better luck if I pinned the strands in place as I went along. Since I was working a narrow braid, I figured that I could use graph paper as a pattern and a blocking board instead of a lace pillow.

Voila! As you might imagine, it was slow-going with all those pins, but IT WORKED. I did the one on the left first, and trust me, it is a great improvement over my previous attempts. Then I did the one to the right, and you can see how much better it already is than the first one. The braids did want to corkscrew, so I spritzed them well and pinned them flat. The problem seems to be solved.

This could be fun!


By my reckoning, I am at least three sidetracks away from where I started and it's time for me to start working my way back. I do want to revisit this, though; I'm a knitter first but all the needle arts are so very tempting to me.

Next up will be using embroidery stitches to attach beads, then back to stretchy cast-ons, then back to the Crimped Stitches themselves. Whew!

I want to wish everyone a happy, healthy, and safe Thanksgiving day. Actually, given the state of the world, let me offer that wish for every day.

Until next time . . .


Friday, November 21, 2014

Tying on Beads

Perhaps the simplest way to add beads after the fact, even easier than sewing them onto your work, is just tying them on.

The first thing to do is get the beads on the yarn. Obviously, the beads need holes "large enough". They don't need to be loose because yarn is squishy, but if the hole is too small you risk breaking the bead.

Any sewing needle that will get through the beads is going to have an eye that is too small to get the yarn through. I generally use a wire threader for a needlepunch tool as shown to the right, but you can get appropriate needles - and just about everything else jewelry - at Fire Mountain Gems.


Once a bead is on a length of yarn, it's a simple matter to pull one end through a space and the other end through an adjacent space. You can use a crochet hook or tapestry needle, whichever is easier. Tie a square knot (right over left and left over right), put a dab of glue on the back of it, especially if the bead is heavy or precious, and let it dry.


And this is my result.

Of course, I looked at it and thought "hmmmmm." What I was seeing was the beads forcing the fringes to stick out. So, I decided to add extra fringe and macrame it into a design. (A nice tutorial for basic macrame knots is here.)


Superwash wool has many virtues but, it turns out,  suitability for macrame is not one of them. I did manage to tie a couple rudimentary knots, but that was it. So, I grabbed some slubbed cotton from my stash to see if plant fibers would work any better. They do, and I think that with more practice, smooth yarn, and an actual plan, I would have come up with something I would be willing to post on my blog. For now, I should probably stick to my knitting.

On the other hand, as I was writing this post, I thought "Hey, maybe I can braid it!" I will save that for next time.

Until then . . .


Friday, November 7, 2014

Embellished Swatch Part 1


I worked a swatch in Crimped Row Stitch #2 using the extra stretchy cast-on. I didn't use a larger needle, but it blocked beautifully.
When I said in my previous post that I saw embellishment potential in the cast-on, I was looking at the large spaces between the clusters, shown by the green arrows. But a smaller space behind the lowest strand in each cluster, shown by the pink arrows, is revealed by sliding a tapestry needle under the strand and gently pulling it away from the knitting.

Now, except for standard fringe, embellishing was not as straightforward as I had imagined. Searching for ideas, I found many awesome web sites. They concern themselves only with embroidery on fabric, but some of the techniques can be extrapolated to knitted items. Two sites that stood out to me are Sarah's Hand Embroidery Tutorials and Beading Arts.


But I digress. I added standard fringe in two colors in the center of the swatch using a lark's head knot. I am absolutely always forgetting which way to pull the fringe through the edge to get the smooth side of the knot (circled in the photo to the right) on the outside of the work. It's a fussy detail, of course, but I like it much better that way!


 My instinct is to insert the crochet hook from the front of the work. This may be correct for actual crocheting, but it's not optimal for adding fringe. The hook has to be inserted from the back. I'm hoping that now that I've done a diagram of it (to the right), I will remember it forever. Time will tell.


More and more lately I've found myself wanting to add embellishments to my designs. So, next up will be some simple ways of adding beads. Until then . . .

Friday, September 26, 2014

Stretchy Enough Cast-On

Throughout the process of developing the crimped stitch patterns, I have run into the problem of how much they spread. This means that cast-ons and bind-offs need to  be r-e-a-l-l-y stretchy. I can usually bind off loosely enough; I just concentrate on stretching the edge as I go along. The cast-on is a problem, in part because you can't really know in advance how much the pattern stitch will spread.

So I went looking for elastic cast-ons.  Here is the video I settled on. This cast-on is meant for k1, p1 ribbing and you can see in the photos how well it works. But, I thought it looked skimpy for a pattern stitch where the cast-on is distorted by the stitches that are drawn up through it.

So I worked out a fix, wrote some notes, and proceeded to get swamped with other things for a couple of months. I started re-swatching to get myself back up to speed and now I can't imagine why I thought the original is anything but adorable. I can see that it also has some extra potential for being embellished. So, that is next. Until then . . .

PS: If you do try the cast-on in the video, note that every other stitch sits twisted on the needle and needs to be worked through the back on the first row.

Saturday, September 20, 2014

Yes, I'm Still Here!

I have been swamped the last few weeks! While I'm catching my breath, I want to remind everyone that it's almost October and my free Jack-o-Lantern Cup Cozy pattern is here and the instructions for seaming it are here.

Also, with just over three months to go until Christmas, you might want to check out my Vintage Christmas Stocking. It's a free Ravelry download available here. Be sure to note the correction in the pattern notes.

I have a whole list of technique things I want to share with you. With any luck, I'll have something new posted by the end of the week. Until then . . .

Sunday, August 10, 2014

Now, where was I . . . ? Oh yeah, Rome!

This was my first trip ever to Italy. Art! Architecture! History! Food! And, of course, yarn!

When my husband first went on a business trip to Rome thirty-ish years ago, he came home with the most amazing novelty yarns. I rather expected that every shop I entered would have a similar selection.

Unfortunately, it turns out that all that beautiful yarn came from just one shop which is no longer in business. There was no shortage of knitting materials, of course, but much of it was fairly standard.


Nevertheless, I did not come home empty-handed.The yarn I bought at Nutarelli is called "Pompeux". It's 60% Cupro and 40% metallic. I'd call it a light fingering weight; I suspect that many knitters would use it as a carry-along yarn. The woman at Nutarelli did not speak English which, obviously, was not an impediment to my purchase.

At Nana e Bobo, I bought a yarn called "Energia". It is from the company Adriafil. It is 46% nylon, 24% acrylic, 22% cotton, and 8% polyester. I'm not going to venture to guess what thickness it would be considered! I also bought a couple of shawl pins; you can never have too many even if you never wear shawls. The woman at Nana e Bobo spoke some English.

At a third shop I bought a pattern stitch dictionary with some unfamiliar-looking stitches. I haven't tried any of the stitches yet; just waiting for some free time, whatever that is.

And that's it! Until next time . . .


Wednesday, July 9, 2014

Two Swatches


These are the results of my experiments using novelty yarns with the stitch pattern in my last post. 

The main color in the upper swatch is a nylon ribbon yarn that I've been experimenting with recently. It's supple and folds and twists on itself, and so creates a wonderful texture. I don't know why or when the metallic contrast yarn got into my stash, but it makes a good companion!

 
The lower swatch uses variegated 
mohair (I think!) as the main color and Shetland wool as the contrast. If you analyze it closely, you can see a bit of an issue with pooling, but the overall effect is one of truly mixed colors.


An issue I've noticed with this stitch pattern is the occasional tendency for great big loops to form on the wrong side. These block right out in the natural fibers, but remain in the nylon ribbon. It's an easy matter to give the most egregious ones a couple of twists to compact them and darn them in under the contrast strands on the back.


Until next time . . .

Monday, June 16, 2014

Crimped Row Stitch #2: Sort Of

In my last post I mentioned the decorative potential of this stitch pattern. What I most wanted to try was using one color (in a finer yarn) for the crimping rows only. This takes some doing since working a color for an odd number of rows (in this case 1) leaves the yarn in the wrong place for the next time. The solution is to work on a double-pointed or circular needle so the stitches can be slid to the other point to take up the contrast color yarn. I also needed to expand the pattern into two halves, one where the patterning is worked on the right side and one where it is worked on the wrong side.

The cast-on is worked in the contrast color yarn. It doesn't matter if you use a single strand or long tail cast on, but the tail end of the yarn must be at the lower right corner when the first row is started. So, if you are using a long-tail cast-on, turn before introducing the main color; for a single strand cast-on, don't turn. This is actually what we do all the time without thinking about it, but here it really matters for having the contrast yarn in the correct position for Row 6.


Another change I made from the original was to make Rows 1 and 7 into stockinette rows, ie. knit on the right side or purl on the wrong side. Without this modification, we get running threads appearing as heavy horizontal bars at the bottoms of the clusters, as you can see in the photo to the right. In this instance, I found them distracting, hence the change. I did not change the selvedge stitches on these rows, though. 

The fabric spreads, so the cast-on and bind-off must be very stretchy. There are any number of videos that show these techniques and/or, of course, you can always use larger needles.


Using a very elastic cast-on, cast on any number of stitches in contrast color (CC), adding 2 sts for side selvedges. Switch to main color (MC).

Row 1 (RS): P1, k until 1 st rem, p1. 
Rows 2 and 4: Knit.
Rows 3 and 5: Purl.
Row 6 (RS): Slip work to other point of needle so that CC is available. Slip selvedge st. Using CC, (sl1 p-wise, knit up st in st 5 rows below slipped st, place the new st and the slipped st onto the LN and k them tog) until 1 st rem. Sl selvedge stitch.

Turn work. Switch back to MC.
Row 7 (WS): K1, p until 1 st rem, k1.
Rows 8 & 10: Purl.
Rows 9 & 11: Knit.
Row 12 (WS): Slip work to other point of needle so that CC is available. Slip selvedge st. Using CC, (purl up a st in st 5 rows below next st on needle, place the new st onto LN and p2tog with next MC st) until 1 st rem. Sl selvedge st. Turn work and switch back to MC.

Repeat from Row 1. Bind off very loosely in pattern on Row 6 or Row 12.


I've started swatching this pattern in novelty yarns and the results so far are exciting! I hope to have two or more swatches for the next post. Until then . . .

Tuesday, May 20, 2014

Crimped Row Stitch #2: Stripes

Horizontal stripes are the easiest method to use to add color(s) to a project. In plain stockinette, they are just stripes; start using other textures - - even the purl side of stockinette - - and the colors may begin to interact in surprising ways. Way back in August 2012, I presented a couple of swatches ( Swatch 1, Swatch 2) that showed how this might work.

Here I present another two using the pattern stitch from the previous post. The patterning is exactly the same in both; the only thing that is different is on which row the color changes are made.

In the swatch in the top photo, a full repeat is worked in each color; the change occurs between Row 6 and the next Row 1 and the unused color is carried up the right hand selvedge. The result is clean stripes that almost look like strings of chunky little beads.

In the lower swatch, the change is made between Rows 5 and 6. In this case, the unused color is carried up the left side. The piece has a definite crochet vibe; I am working on ideas to make fuller use of that quality.


The closeups:


The selvedges of both pieces were erratic, something I don't remember on the one-color swatch. In particular, the right selvedge of the second swatch was very rippled. I stretched the wet swatch out quite far and then patted it back into shape. That worked very well for this swatch, but then again, I am using superwash Merino. Other yarns may not be as cooperative.

Until next time . . .

Tuesday, May 6, 2014

Crimped Row Stitch #2

This is, as promised, the purl version of the previous pattern stitch. Since this particular variant looked puny as a four-row pattern, I turned it into a six-row repeat.

Basic Stitch #2
(Notice that patterning is worked on the WS.) 
Using a needle 1 or 2 sizes larger than the one you will be knitting with, cast on any number of stitches, plus 2 for selvedges.
Rows 1, 3, & 5 (RS): Purl.
Rows 2 & 4: Knit.
Row 6: K1, yf. Insert RN from back into st 5 rows below next st on needle and purl up a st. Place the new st on LN without twisting it and p2tog. Continue until 1 st rem; yb, k1. 

Bind off loosely in Row 6 pattern.


As before, the first repeat of patterning has the new stitches being drawn up through the stitches of the cast-on; they're just purled instead of knit. Also the Row 6 stitches are enlarged, so they're obvious on the next repeat.

The extra rows make the solid areas look, to my eye at least, like little bundles of yarn cinched up with knit stitches. I'm sure there is decorative potential in there somewhere and that is what I will be exploring next.


Until then . . .


Friday, April 25, 2014

Crimped Row Stitch #1

I have more ideas for  modifying "Old Shale", most notably using eccentric increases and/or putting the decreases on different rows than the increases. By "eccentric", I was thinking of drawing up new stitches through various places in previous rows. I would decrease them out over several rows so that the new stitches would fan out over the background. It was a nice thought, but I ended up with a mass of strands I couldn't identify and decreases that did not correspond to the increases they were supposed to. I still like the idea; I filed my notes and swatches and I'm going to let the idea simmer for a while. In the meantime, I started a swatch where I drew up stitches and decreased them out quickly. And that created a topic for the next few posts. 


Unlike knitting in a row below the next stitch and allowing the intervening stitches to drop, these pattern stitches keep all the previous rows intact. For this reason, they can be done on every stitch in a row without  the row below completely unraveling. The process puts little crimps in the fabric, hence the name.
 
 
Basic Stitch #1 
(Notice that patterning is worked on the WS.)

Cast on any number of stitches, plus 2 for selvedges. Use a needle 1 or 2 sizes larger than the one you will be knitting with.
Rows 1 & 3 (RS): Purl.
Row 2: Knit.
Row 4: K1. Insert RN from front into st 3 rows below next st on needle and knit up a st. Place the new st on LN without twisting it and k2tog-b. Continue until 1 st rem; k1.

On the first pass through the pattern, the new stitches will be drawn up in the sts on the cast-on row as shown in the diagram. (I used a knitted on cast-on.) The patterning produces enlarged sts which will be three rows below when the next patterning row is worked.

Bind off loosely in pattern Row 4.


This stitch biases wildly before it is blocked. I used superwash Merino wool for this swatch. When wet, it is an extremely malleable material, so I was able to block it to get the result above. Obviously, it's important to block your swatch before you start a project, especially if you plan to use synthetic yarn. (Need I add that this is a good practice anyway?)

Next up will be the purl version of the basic stitch. Until then . . .


Monday, April 7, 2014

No Plain Rows

The next logical step after a pattern stitch with
only one plain row is a pattern stitch with no plain rows. At this point, the fabric becomes a different animal: the yarn overs are separated by single strands of yarn as opposed to the linked strands when there are plain rows. In fact they are given different names. The former is called "knitted lace" and the latter is "lace knitting". To me, this is somewhat akin to remembering what happens if the groundhog does or does not see its shadow. The names, of course,  are not nearly as important as the results.

I've been doing my swatches in Shetland wool since "Old Shale" is a Shetland pattern. This is wool that I can break with my hands, and on occasion I have - - without trying. I was concerned that  the single strands would not hold up and decided to do my swatch in a substantial cotton. As it turns out, I needn't have worried because there are a number of traditional Shetland stitches patterned on both sides. (Search for "Shetland Lace" and you will find some jaw-dropping eye candy!)

My first attempt was an offset pattern with the wrong side decreases above the right side increases and so on. It was horrible! I will keep less than successful swatches because there is always something to be learned from them, but I unraveled this one immediately. For the second swatch, I stacked the increases and the decreases and worked the same row repeatedly, both right side and wrong side like garter stitch except in lace. This result  looked a little muddled as you can see in the photo. The swatch pictured above is done as a two row pattern with knitted decreases on the right side and purled decreases on the wrong side. They are still basically the same row; if I were to work it in the round, I'd work every row as a right side row. For this reason, the chart has only one row. Since Row 1 is indicated on the right of the chart, it is a right side row and is worked as such. Row 2 is indicated on the left of the chart and thus is a wrong side row.


There are three things to notice in the closeup. First is the awesome texture of the solid areas. Second is the open area formed by the column of yarn overs that are not eventually "consumed" by the decreases; this is indicated by the green arrow. Finally, the blue arrow points to a "bonus" open area. This is formed between the three-decrease groups. (It is similar to the gap that forms on socks if you don't put one or two knit stitches between the decreases on the toes.)


Bind off in pattern, but put a (yo, bind off) between the pairs of decreases where the gaps occur.

Until next time . . .


Wednesday, March 26, 2014

Two-Row Patterns


When I was pondering changing the four-row pattern to a stacked arrangement and before I started charting, I didn't really give much thought to the potential result. It turns into a two-row pattern. Also, now that the pattern elements are stacked again, we get the peaks and valleys of Old Shale. They are sharper than the original, though, because of the smaller number of intervening plain rows.


I decided to try two different decrease styles as you can see in the photos and charts. As always, lines of stitches lean towards the decreases and away from the increases but in the mixed decrease sample they are much softer. I did not work a sample where the mixed decreases lean away from the central stitches; if anyone tries it, please let us know how it looks!


Charts


The next logical step will be a pattern with no plain rows. The swatch for that is fighting me at every juncture, so it might be a little longer than usual. I also plan to add a page of chart symbols; that will eliminate the need to repeat the symbols on every post. Until then . . .

Monday, March 17, 2014

Stained Glass Stripe

This is the four-row offset lace pattern that evolved from the swatch in the previous post. I love it; it has the delicacy of lace but robust texture within the "stripes".


  Here is the chart. The chart symbols are here.


Now to the name of the stitch. My husband was looking at the swatch with me and we happened to have it backlit. We decided simultaneously that it resembled stained glass. (Why, yes, we have been married a very long time!)

While working on this swatch, I began to wonder what a four-row pattern would look like if I didn't offset the pattern units. That's for next time. Until then . . .


Friday, March 7, 2014

One off the "To Try" List

A couple of posts ago, I pondered how the Offset Pattern would look if all the decreases were sl2-k1-p2sso. As it turns out, not all that different. You can see from the closeups that the outer three stitches on each side of a group are pulled towards the central stitch no matter which decreases are used; the groups using the slanted decreases are ever so slightly rounder. The chart is very similar to the previous one given that only the decreases are changed.


While I was working on the above swatch, I got to wondering why I needed to do all those extra rows of Stockinette Stitch. I decided to reduce the pattern to four rows and convert the wrong side rows to purl. That pattern will be the subject of my next post.

Until then . . .

Monday, February 17, 2014

Crocus Stitch

One of the "improvements" I wanted to make to the offset pattern in the last post, was to condense the increases. Instead of six yarnovers spaced out around five knit stitches, I decided to try putting them all in and around one stitch, ie. yo, (k1, yo, k1, yo, k1) in the same st, yo. This still adds six stitches, but they are pushed closer together and, more importantly, some of them are solid. The result is quite pretty.


 Here's a closeup.


The chart needs some explaining. Those black squares mean "No Stitch"; they are placeholders. In order to design this particular pattern, I needed to "break open" the chart it was derived from. That was the only way I could see which increases are "consumed" by which decreases and how they line up. You can almost see the crocus shapes in the chart!
Now, this pattern retains the same stitch count throughout, so I could have eliminated the black squares. I did start doing just that, but the chart was clearly less effective that way, so I give you the expanded chart.


One last consideration is selvedges. The (k1, yo, k1) in the same stitch at the ends of Row 7 creates a cute little "picot". If the picots are blocked impeccably, they create a nice outer edge. I haven't quite decided what to do for a selvedge for seaming, though. Certainly that would require an extra stitch at each edge; I'm just wondering if those nice indentations would remain open or if I would need to do some sort of yarnover-decrease maneuver. (My "To Try" list just got a bit longer!)

Until next time.