Tuesday, May 20, 2014

Crimped Row Stitch #2: Stripes

Horizontal stripes are the easiest method to use to add color(s) to a project. In plain stockinette, they are just stripes; start using other textures - - even the purl side of stockinette - - and the colors may begin to interact in surprising ways. Way back in August 2012, I presented a couple of swatches ( Swatch 1, Swatch 2) that showed how this might work.

Here I present another two using the pattern stitch from the previous post. The patterning is exactly the same in both; the only thing that is different is on which row the color changes are made.

In the swatch in the top photo, a full repeat is worked in each color; the change occurs between Row 6 and the next Row 1 and the unused color is carried up the right hand selvedge. The result is clean stripes that almost look like strings of chunky little beads.

In the lower swatch, the change is made between Rows 5 and 6. In this case, the unused color is carried up the left side. The piece has a definite crochet vibe; I am working on ideas to make fuller use of that quality.


The closeups:


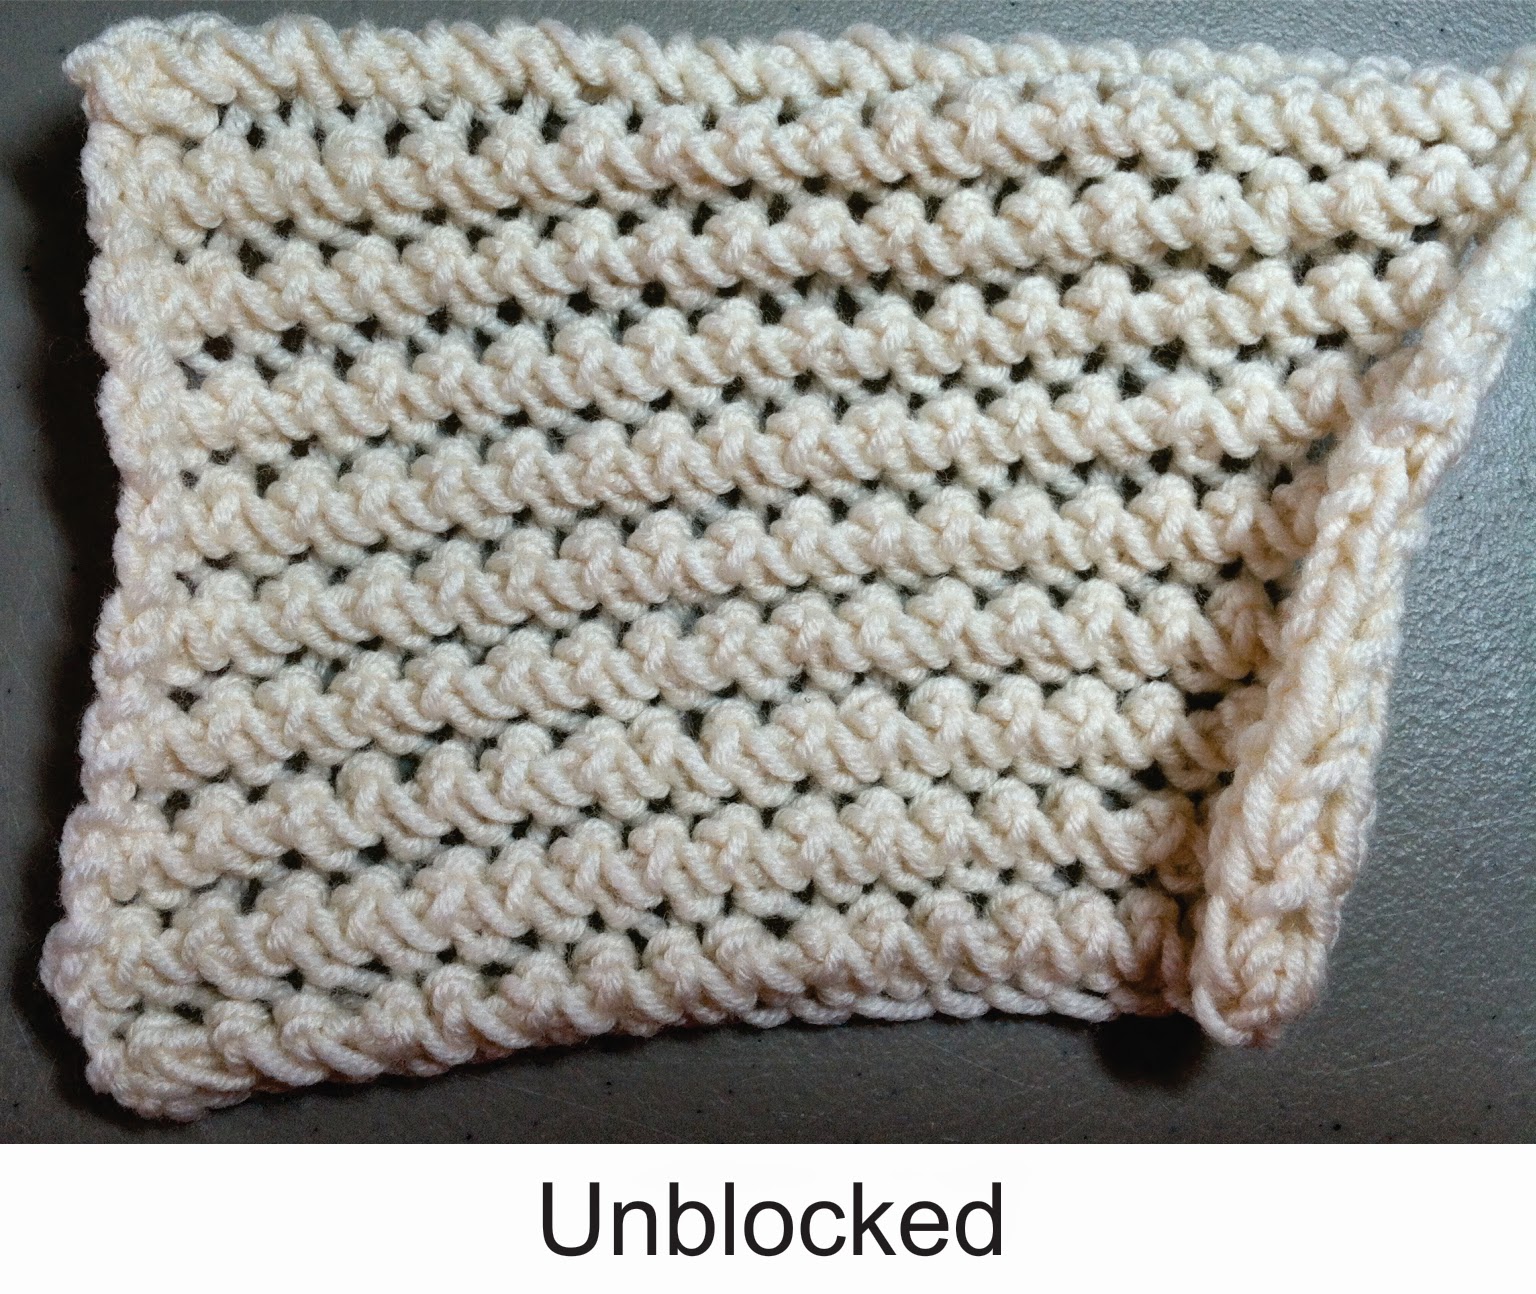
The selvedges of both pieces were erratic, something I don't remember on the one-color swatch. In particular, the right selvedge of the second swatch was very rippled. I stretched the wet swatch out quite far and then patted it back into shape. That worked very well for this swatch, but then again, I am using superwash Merino. Other yarns may not be as cooperative.

Until next time . . .

Tuesday, May 6, 2014

Crimped Row Stitch #2

This is, as promised, the purl version of the previous pattern stitch. Since this particular variant looked puny as a four-row pattern, I turned it into a six-row repeat.

Basic Stitch #2
(Notice that patterning is worked on the WS.) 
Using a needle 1 or 2 sizes larger than the one you will be knitting with, cast on any number of stitches, plus 2 for selvedges.
Rows 1, 3, & 5 (RS): Purl.
Rows 2 & 4: Knit.
Row 6: K1, yf. Insert RN from back into st 5 rows below next st on needle and purl up a st. Place the new st on LN without twisting it and p2tog. Continue until 1 st rem; yb, k1. 

Bind off loosely in Row 6 pattern.


As before, the first repeat of patterning has the new stitches being drawn up through the stitches of the cast-on; they're just purled instead of knit. Also the Row 6 stitches are enlarged, so they're obvious on the next repeat.

The extra rows make the solid areas look, to my eye at least, like little bundles of yarn cinched up with knit stitches. I'm sure there is decorative potential in there somewhere and that is what I will be exploring next.


Until then . . .


Friday, April 25, 2014

Crimped Row Stitch #1

I have more ideas for  modifying "Old Shale", most notably using eccentric increases and/or putting the decreases on different rows than the increases. By "eccentric", I was thinking of drawing up new stitches through various places in previous rows. I would decrease them out over several rows so that the new stitches would fan out over the background. It was a nice thought, but I ended up with a mass of strands I couldn't identify and decreases that did not correspond to the increases they were supposed to. I still like the idea; I filed my notes and swatches and I'm going to let the idea simmer for a while. In the meantime, I started a swatch where I drew up stitches and decreased them out quickly. And that created a topic for the next few posts. 


Unlike knitting in a row below the next stitch and allowing the intervening stitches to drop, these pattern stitches keep all the previous rows intact. For this reason, they can be done on every stitch in a row without  the row below completely unraveling. The process puts little crimps in the fabric, hence the name.
 
 
Basic Stitch #1 
(Notice that patterning is worked on the WS.)

Cast on any number of stitches, plus 2 for selvedges. Use a needle 1 or 2 sizes larger than the one you will be knitting with.
Rows 1 & 3 (RS): Purl.
Row 2: Knit.
Row 4: K1. Insert RN from front into st 3 rows below next st on needle and knit up a st. Place the new st on LN without twisting it and k2tog-b. Continue until 1 st rem; k1.

On the first pass through the pattern, the new stitches will be drawn up in the sts on the cast-on row as shown in the diagram. (I used a knitted on cast-on.) The patterning produces enlarged sts which will be three rows below when the next patterning row is worked.

Bind off loosely in pattern Row 4.


This stitch biases wildly before it is blocked. I used superwash Merino wool for this swatch. When wet, it is an extremely malleable material, so I was able to block it to get the result above. Obviously, it's important to block your swatch before you start a project, especially if you plan to use synthetic yarn. (Need I add that this is a good practice anyway?)

Next up will be the purl version of the basic stitch. Until then . . .


Monday, April 7, 2014

No Plain Rows

The next logical step after a pattern stitch with
only one plain row is a pattern stitch with no plain rows. At this point, the fabric becomes a different animal: the yarn overs are separated by single strands of yarn as opposed to the linked strands when there are plain rows. In fact they are given different names. The former is called "knitted lace" and the latter is "lace knitting". To me, this is somewhat akin to remembering what happens if the groundhog does or does not see its shadow. The names, of course,  are not nearly as important as the results.

I've been doing my swatches in Shetland wool since "Old Shale" is a Shetland pattern. This is wool that I can break with my hands, and on occasion I have - - without trying. I was concerned that  the single strands would not hold up and decided to do my swatch in a substantial cotton. As it turns out, I needn't have worried because there are a number of traditional Shetland stitches patterned on both sides. (Search for "Shetland Lace" and you will find some jaw-dropping eye candy!)

My first attempt was an offset pattern with the wrong side decreases above the right side increases and so on. It was horrible! I will keep less than successful swatches because there is always something to be learned from them, but I unraveled this one immediately. For the second swatch, I stacked the increases and the decreases and worked the same row repeatedly, both right side and wrong side like garter stitch except in lace. This result  looked a little muddled as you can see in the photo. The swatch pictured above is done as a two row pattern with knitted decreases on the right side and purled decreases on the wrong side. They are still basically the same row; if I were to work it in the round, I'd work every row as a right side row. For this reason, the chart has only one row. Since Row 1 is indicated on the right of the chart, it is a right side row and is worked as such. Row 2 is indicated on the left of the chart and thus is a wrong side row.


There are three things to notice in the closeup. First is the awesome texture of the solid areas. Second is the open area formed by the column of yarn overs that are not eventually "consumed" by the decreases; this is indicated by the green arrow. Finally, the blue arrow points to a "bonus" open area. This is formed between the three-decrease groups. (It is similar to the gap that forms on socks if you don't put one or two knit stitches between the decreases on the toes.)


Bind off in pattern, but put a (yo, bind off) between the pairs of decreases where the gaps occur.

Until next time . . .


Wednesday, March 26, 2014

Two-Row Patterns


When I was pondering changing the four-row pattern to a stacked arrangement and before I started charting, I didn't really give much thought to the potential result. It turns into a two-row pattern. Also, now that the pattern elements are stacked again, we get the peaks and valleys of Old Shale. They are sharper than the original, though, because of the smaller number of intervening plain rows.


I decided to try two different decrease styles as you can see in the photos and charts. As always, lines of stitches lean towards the decreases and away from the increases but in the mixed decrease sample they are much softer. I did not work a sample where the mixed decreases lean away from the central stitches; if anyone tries it, please let us know how it looks!


Charts


The next logical step will be a pattern with no plain rows. The swatch for that is fighting me at every juncture, so it might be a little longer than usual. I also plan to add a page of chart symbols; that will eliminate the need to repeat the symbols on every post. Until then . . .

Monday, March 17, 2014

Stained Glass Stripe

This is the four-row offset lace pattern that evolved from the swatch in the previous post. I love it; it has the delicacy of lace but robust texture within the "stripes".


  Here is the chart. The chart symbols are here.


Now to the name of the stitch. My husband was looking at the swatch with me and we happened to have it backlit. We decided simultaneously that it resembled stained glass. (Why, yes, we have been married a very long time!)

While working on this swatch, I began to wonder what a four-row pattern would look like if I didn't offset the pattern units. That's for next time. Until then . . .


Friday, March 7, 2014

One off the "To Try" List

A couple of posts ago, I pondered how the Offset Pattern would look if all the decreases were sl2-k1-p2sso. As it turns out, not all that different. You can see from the closeups that the outer three stitches on each side of a group are pulled towards the central stitch no matter which decreases are used; the groups using the slanted decreases are ever so slightly rounder. The chart is very similar to the previous one given that only the decreases are changed.


While I was working on the above swatch, I got to wondering why I needed to do all those extra rows of Stockinette Stitch. I decided to reduce the pattern to four rows and convert the wrong side rows to purl. That pattern will be the subject of my next post.

Until then . . .